April 13, 2020
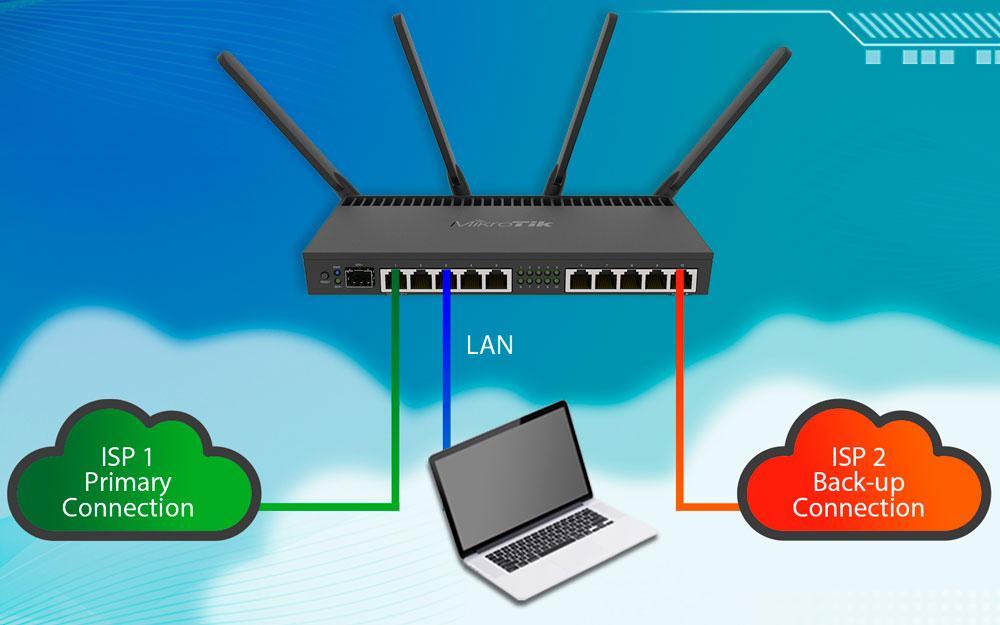
There are multiple ways to achieve ISP redundancy with MikroTik. Some ways are more complex and offer additional functionality. This article serves as an introduction on simple ways to achieve failover using RouterOS and assumes all basic configuration has already been completed on the router.
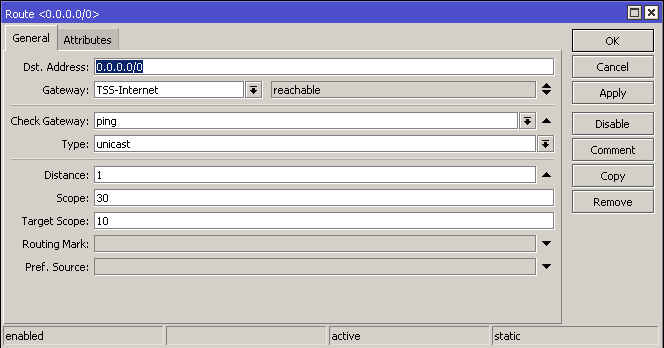
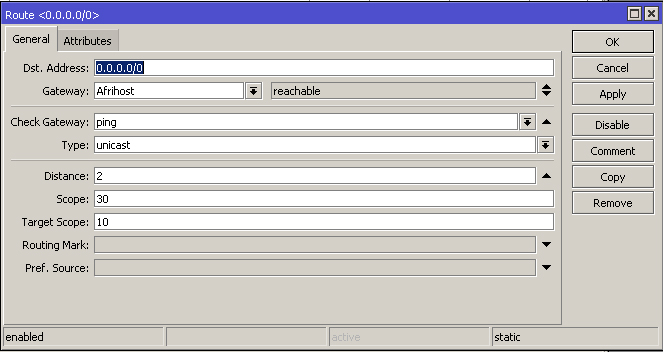
1. Static Routing with Distance
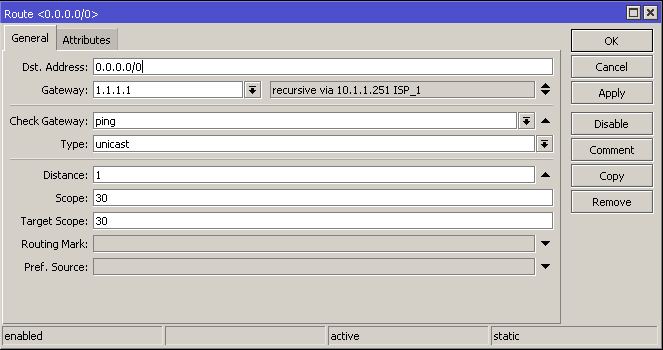
Instead of allowing your router to add the default routes via their interfaces automatically, you can add them manually to the routing table. When adding routes manually, it gives you control of additional parameters which can be applied to the route. The idea is to have multiple default routes to the internet at varying distances as the route with the smallest distance will take preference in most cases. The 'Check Gateway' option must be set to ping which will periodically (every 10 seconds) check the gateway connection. After 2 timeouts, the route is considered unreachable and the route with the greater distance will kick into action./ip route
add check-gateway=ping distance=1 gateway=TSS-Internet
add check-gateway=ping distance=2 gateway=Afrihost

There are disadvantages to the Static Routing with Distance method. One disadvantage is that it relies on the gateway IP address to check connectivity. If there is a failure after that gateway IP, it would go undetected and routes would never switch over. There may also be problems with already-established connections when your primary routes come back online which could be solved using the firewall mangle in RouterOS.
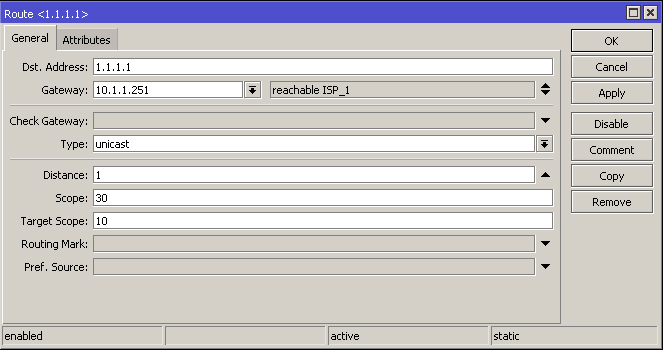
2. Recursive Lookup
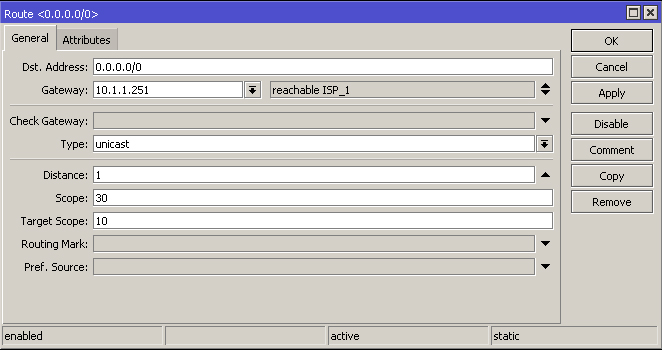
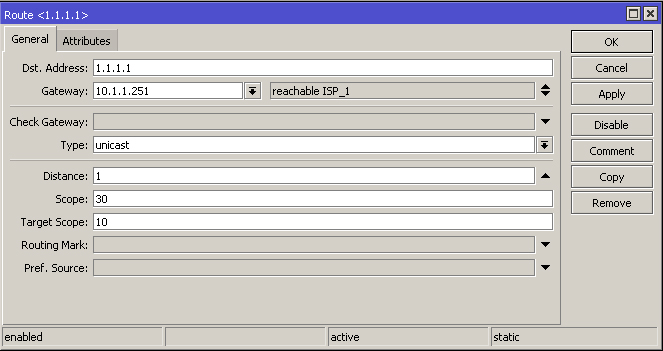
If you would prefer your failover to not rely on the gateway IP, then you may want to consider using Recursive Routing as a solution. The static routing principle above remains the same but instead, reachable IP addresses on the internet are used e.g 1.1.1.1 or 8.8.8.8.Recursive Routing only works with IP addresses and therefore is not suitable for dynamic interface types like PPPoE or DHCP where the IP can change.
This approach requires two static routes per ISP. The first one to 'tell' your router how to get to your desired IP on the internet. Adjust your distance accordingly based on which ISP should take preference. Each ISP should use different internet IP addresses to check connectivity.
/ip route

add distance=1 dst-address=1.1.1.1/32 gateway=10.1.1.251
The second route will take you out to the internet but you will need to adjust the 'target scope' field to match the value of the above route for it to be functional. Remember to 'Check Gateway' to enable redundancy.
/ip route

add check-gateway=ping distance=1 gateway=1.1.1.1 target-scope=30
Now the router does not rely on the gateway IP to check connectivity but you may still experience connectivity problems with already-established connections when switching back and forth between ISP's.
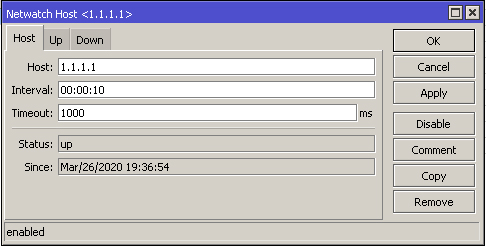
3. Netwatch
This tool allows you to check host IP addresses and issue script commands based on their status. Scripts can be executed to enable/disable routes, clear connections on the firewall and provide log information when this occurs. This method is very useful for re-establishing connections to the firewall to mitigate connectivity problems when switching ISP's. This method also allows use for dynamic gateway interfaces.Start by creating static routes with separate distances for your ISP's
/ip route

add distance=1 gateway=10.1.1.251
Create a route for a reachable IP on the internet for each ISP. Remember to use different reachable dst-address IP's.
/ip route

add distance=1 dst-address=1.1.1.1/32 gateway=10.1.1.251
Netwatch must be configured to ping the internet IP's every 10 seconds and perform a script action when it is up or down. The scripts will automatically enable and disable your routes as they become available.
Script explanation: If 1.1.1.1 is reachable, enable this route and display in the log if it was previously disabled.
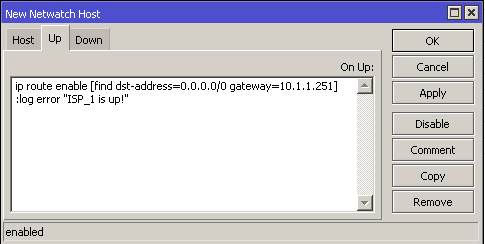
:log error "ISP_1 is up!"
Script explanation: If 1.1.1.1 is unreachable, disable this route, display in the log and remove active connections in the firewall.
Once executed, all connections in the firewall will re-establish via the failover ISP.
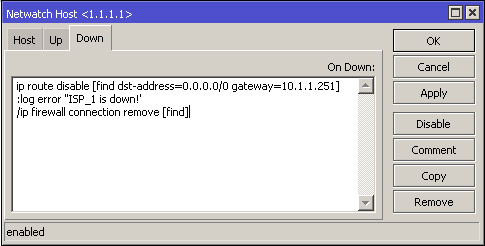
:log error "ISP_1 is down!"
/ip firewall connection remove [find]
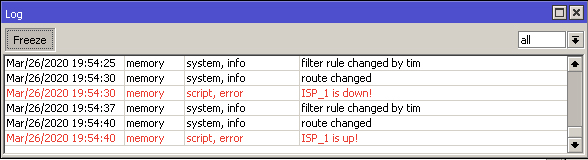
Repeat the above process for both ISP's and you should be able to see the results in real-time by checking the routing table and logs.
TIP: test by using the firewall to drop ICMP traffic to your selected host.
/ip firewall filter

add action=drop chain=output dst-address=1.1.1.1 protocol=icmp
Although the above has only really scratched the surface for redundancy possibilities, they are effective methods to achieve basic failover and I trust they will serve you well. There are some excellent MUM presentations online which can assist with more complex setups which include load balancing.
https://mum.mikrotik.com/presentations/US12/tomas.pdf
https://mum.mikrotik.com/presentations/US12/steve.pdf
If you are interested in learning more about MikroTik, consider attending our certified training.
https://scoop.co.za/products/certified-training/certified-mikrotik-courses/
References:
https://wiki.mikrotik.com/wiki/Manual:IP/Route
https://wiki.mikrotik.com/wiki/Manual:Tools/Netwatch